KIM’S ELECTRIC CAR PAGE
Front battery mounts
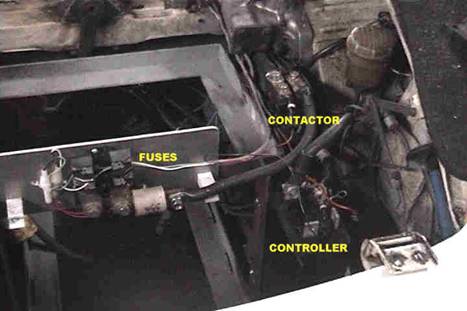
Electrical parts

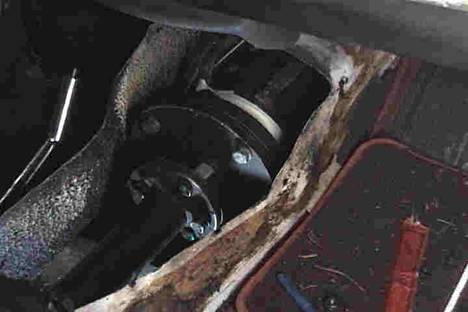
Rear motor mount and driveshaft adaptor
(the rubber flex coupling is original equipment)
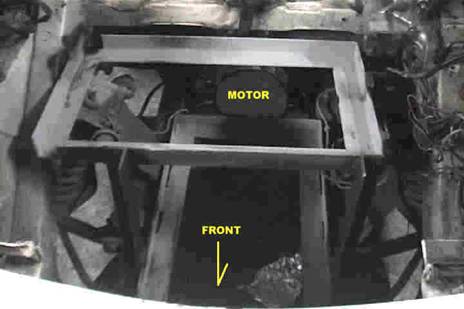
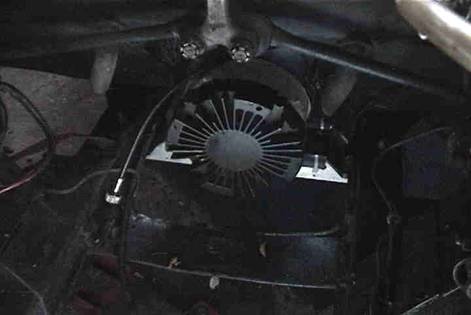
Motor in place in the transmission hump
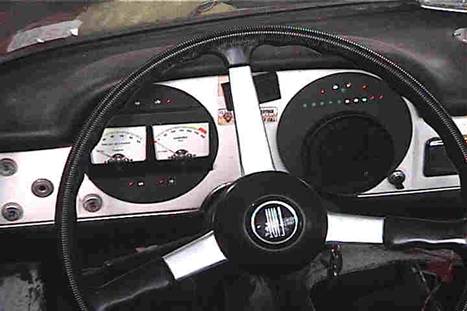
Instruments, electronic speedometer on right.
LED indicators on right for future use.
Indicators on right for lights, turn signals, etc.
Rear motor brace
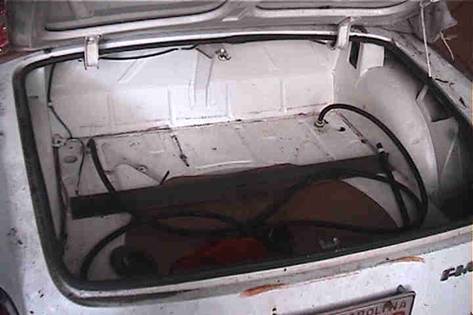
4 Batteries go in the trunk. Surprisingly, standard spare tire
still is accessible.
As the project moved closer to completion, I stopped taking pictures in favor of more car work.
Soon I will post some pictures of the finished project with batteries in place.
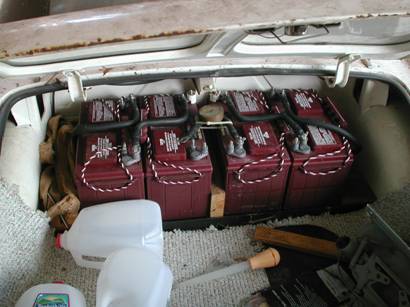
4 batteries in the trunk, note tow strap on right and battery temperature gauge laying on the connecting cable in center.
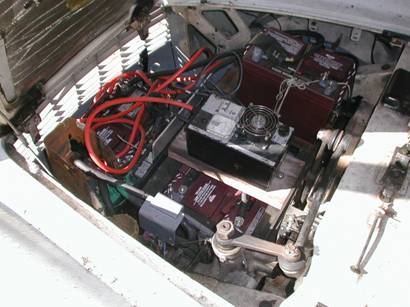
4 large batteries up front, with home-made temporary non-automatic charger resting in the area provided for two additional big motor batteries. The smaller battery on the upper level is for all of the twelve volt stuff from the original car plus the electronic speedometer. Plastic rain shield for controller at left center, to protect from rain blown in through the grille while driving.
These last two pictures do not show the permanent battery securing hardware for the trunk batteries and the smaller battery on the top level, which were the last parts added. Note unsightly but effective temporary battery securing hardware on the top battery in this photo.
HOME: http://www.falconlabs.com